DIY Ice Candles
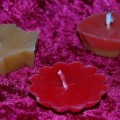
 Ice candles, also known as ice cube candles, are a fun a way to give your candles an almost lace-like appearance.
To start, get yourself a square or round pillar candle mold and a taper candle the same color you want your finished candle to be. You can use any type of wax for these candles, as long as it’s not container blend, otherwise your wax will stick to the side of the mold and you won’t be able to get your candle out. (Candlewic.com has a selection of Ecosoya wax which is a sustainably sourced soy wax, and therefore quite eco-friendly)
Heat your chosen wax to pouring temperature. Once your wax has reach pouring temperature, add in your chosen color and stir well. Pour a half inch of wax into the bottom of your mold and place your taper candle in the center. Let the wax harden around it.
Reheat your wax to pouring temperature and add scent if you desire. Then take some ice cubes. The bigger the ice cubes are, the bigger the holes will be in your ice candle. So if you want smaller, lacier holes, break your ice cubes into smaller chunks.
Pour your ice cubes into your candle mold around the center taper candle. Then take your heated wax and slowly pour it into the candle mold, right over the ice cubes, all the way to the top. Stop pouring when the wax reaches the top of the taper candle. Then leave the candle to harden. You won’t have to do a second pouring on this candle due to the taper candle in the center. The candle should cool quicker than normal as well, due to all the ice cubes.
When your candle has completely hardened, take the mold over to your sink (there’s going to be a lot of water in a moment). Carefully pull your candle out of the mold, letting the water from the melted ice cubes fall into the sink. Your candle should be full of holes where the ice cubes were.
Shake your candle and listen for any sloshing indicating trapped pockets of water. If you hear any, discern the location of the trapped water, then take a knitting needle, or similar pointed object, and poke it into the wax to free the water. Then let your candle dry, light, and enjoy. Copyright © Amber Reifsteck ~ The Woodland Elf
The information provided on this website is for general information purposes only. If you choose to rely on the information on this website, you do so at your own risk and you assume responsibility for the results. (Full disclaimer here)
Enjoy this post? Click here to subscribe by email and get new posts delivered to your inbox.Ads by Google