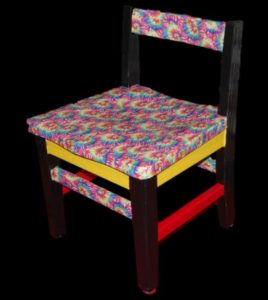
Easy DIY Duck Tape Chair
It’s super easy to spice up a plain, boring chair by adding a whimsical pop of color. All you need is some Duck tape, a pair of scissors, and a little imagination. No painting skills required!
 MATERIALS USED:
An old chair
2 or 3 rolls of plain colored Duck tape (I used black, red, and yellow)
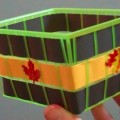
1 roll of printed Duck tape (I used tie-dye 283268)
Scissors
This chair makes a great, bright colored addition to a child’s room or can just be used as a psychedelic conversation piece. Depending on how many Duck tape rolls you use, it can be constructed for around $10. You could also just duct tape the seat and back board with printed tape, and paint the plain areas. I’ve found dark colors such as black really set off the colorful printed tape, but if you chose a tape that’s a little darker, you might want to paint your legs something a little brighter to give it a bit more contrast.
The fun part about this chair is that there are no rules. You make your chair any way you want. Take whatever your favorite roll of Duck tape is and go crazy. Instead of putting plain colors around the print as I did, you might decide you want to do the entire chair in a whimsical print of tape. Or you can do the seat and back board with one print, and the legs with another. The sky’s the limit, and you can decorate your chair to match any of your decor.
Whatever design you choose to do, just make sure that you cut each piece of Duck tape instead of ripping it. This will ensure a smooth, clean edge so the strips can adhere to each other without sticking up. If you the rip the tape, the edges will be all torn and ruffled, and you’re likely to have them sticking to your bottom when you sit on the chair. So be sure to cut, not rip.
One thing that is a good idea to invest in for this project is a pair of Duck tape scissors. I was going to get a pair, and then got snowed in so I didn’t make it to town before I started this project. As a result, I had to soak the Duck tape gum off my scissor blades when I was done. The Duck tape scissors are said to be coated blades, specifically to prevent the Duck tape gum from building up on them. (I haven’t tried them, so I can’t vouch for them yet, but I’m planning to get a pair before my next Duck tape project…because trying to soak the Duck tape gum off my blade is not fun…)
Give it a try and have a good time doing it. I’m a fan of the tie-dye Duck tape, but there are so many to choose from. Leave me a comment below and let me know what your favorite Duck tape print is.
Video tutorial by Amber Reifsteck, The Woodland Elf
*Some of the above links may be affiliate links*
The information provided on this website is for general information purposes only. If you choose to rely on the information on this website, you do so at your own risk and you assume responsibility for the results. (Full disclaimer here)
Enjoy this post? Click here to subscribe by email and get new posts delivered to your inbox.Ads by Google