
How to Use Chalk Markers (Review and How-to)
 Chalk markers are a fun way to get the look of chalk without the mess.
So this post is part review, part how-to. Chalk markers are also known as chalkboard markers, chalk pens, wet wipe markers, window markers, and liquid chalk. One of the cool things about chalk markers is that they’re dust free, which makes them great for teachers if they don’t want to breathe in harmful chalk dust all the time, or for kids with asthma (they’re also totally odor-free). Chalk markers give you better drawing precision than regular chalk, since you hold them like a pencil, so they’re perfect for crafting. And even though chalk markers are a liquid chalk, I actually found them to be a lot less messy than standard chalk, because they’re similar to pens. The ink stays inside and on the tip, so it doesn’t get all over your fingers or flake off into your clothes like regular chalk does.
The chalk markers that I used were from Chalkola. The company sent me a sample for review purposes and I found them to be really nice quality, and a lot of fun to play with (come on, who doesn’t love playing with neon markers, no matter what age they are?) I also do have a video at the end of this post so you can see them in action too, but here’s the written how-to for using them.
So the chalk markers come in 2 sizes, 6mm and 15mm. The 6mm have a standard, round  marker/pen type tip, so they’re better for any kind of detail coloring or writing. (You can get them here on Amazon.com and use Coupon Code: CHALK20A for 20% off the order. UK readers follow this link) And the 15mm have a flat tip which makes them perfect for calligraphy style writing, or filling in large spaces of coloring (you can get the 15mm here on Amazon.com and use Coupon Code: CHK20OFF for 20% off).
Using Chalk Markers
The first time you use chalk markers, you have to “prep” them, meaning you have to get the ink flowing. Initially the pen tips are totally clean, so you have to let them get saturated with ink before they’ll write. To do that, you shake it up real good, and then press the marker tips up and down on a hard surface a few times, and then while pressing the tip down, rock the marker back and forth to get the ink flowing . The package says it takes up to 3 minutes to get the ink flowing, but I actually found it only takes about 30-60 seconds or so.
You’ll only have to do the prep step the first time. Once you’ve got the ink flowing initially, it’s always ready when you go to use them the next time. If the marker starts to dry, just give it one bounce to refresh the ink supply. Once you do have your markers prepped, however, you’ll want to make sure you store them upright or horizontally so the ink doesn’t seep out the tips while they’re not in use.
 So basically you can use chalk markers on any non-porous surface like glass, metal, plastic and of course, chalk boards. The chalk takes about a minute to dry, and once it does, it’s pretty much permanent until you decide to wipe it off, and won’t rub off if you accidentally smear your hand across it (well, unless your hand happens to be soaking wet at the time). When you’re ready to rub it off, just a take wet rag and it comes away clean. They can also double as dry erase markers on whiteboards (it just takes slightly firmer rubbing to wash them away if your rubbing them dry).
Chalk markers are made so the top color always stays on top, no matter how light or dark the shade is. You can color a line of black marker, let it dry, and then color over it with a line of yellow, and the yellow will cover the black. This makes them very convenient if you want to have intersecting lines of color, but don’t want your lighter colors getting swallowed up by the darker shades. You can hold them at any angle to draw with, but I found the best way was at a 45 degree angle, like a calligraphy pen. It seemed to keep the ink flowing without having to replenish, and made the lines super crisp.
So the one con I found is that if you have a matte surface chalkboard, and you leave the marker on it for a week or so, when you rub it off, it does leave a bit of shadow behind, and you either have the scrub the heck out of it, or use a magic eraser or something strong to remove it. However, I did not have that problem on the shiny-surfaced blackboards or my white board. It came off both the latter fine, even after having been on there a week. (I did not test them on chalkboard paint, so I can’t comment on that, and I didn’t spill any on my clothing, so I can’t comment on the washability either, but according to the package, they are in fact washable. Note for parents, they do wash very easily off skin if your kids are using them).
Project Ideas with Chalk Markers
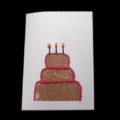
Obviously one of the best things to use chalk markers for is holiday decorating. Because  the markers can wash off when you’re done with them, you can change your designs depending on the time of year. You can decorate the windows or the dishes to match the season for a holiday feel. Or use them on some mini-chalk boards to make festive, seasonal coasters. And on the flip-side, you could use them to decorate windows and glasses at graduation parties, and wash them away when the party is over.
They can be used at weddings to decorate the car with the customary “Just Married” sign. Initial wine glasses so there’s no mix ups during the ceremony. Or use mini chalkboards to write place settings. All of which rubs away after the initial celebration is over.
Chalk markers also make a great birthday party activity. Give them to the kids along with some plain mugs to decorate. They’ll have fun, and it serves as a practical way to keep everyone’s cups separate. And it would probably wouldn’t take too much coaxing to get the parents in on the fun (remember, coloring has been shown to be healthy now).
If you’re a restaurant/bistro owner, you can use them to for your specials menus or street sandwich boards, since they have better staying power than white board markers or traditional chalk (the local grocery stores uses them on their signs for that very reason). And in my case, as a farmer, they’re probably going to come in handy for pricing produce and flowers at the farm market.
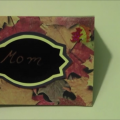
And finally, probably my favorite part, chalk markers are great for labeling. Whether it’s labeling store room items, or jars or preserves, chalk markers are perfect because they stay on great until you decide to wash them off. Last year’s jar labeled peaches, can easily be erased to label this year’s jar of beans.
 Chalkola also sells chalk board labels, which are basically waterproof stickers that have a non-porous surface so you can write on them again and again. I’ve decided they’re pretty much one of the coolest things ever invented and I am sooo in love with them. They’re so convenient and functional while still being totally cute. I’ve started using them on all the mason jars that I use for seed saving, my sewing closet drawers, and all my farm market boxes, because they’re so much cuter than my usual strip of masking tape or scrap paper. Plus, I don’t have to keep replacing them every year; just erase the old label, and write on the new. It doesn’t get better than something that’s functional while still being cute. And if you punch a hole in them and add little string, they’d be great as reusable gift tags too.
So below is the video I shot if you want to see how to use chalk markers in action:
Copyright © Amber Reifsteck ~ The Woodland Elf
The information provided on this website is for general information purposes only. If you choose to rely on the information on this website, you do so at your own risk and you assume responsibility for the results. (Full disclaimer here)
Enjoy this post? Click here to subscribe by email and get new posts delivered to your inbox.Ads by Google


Your article is really well written, but my favorite part was the project ideas… it was really helpful. I must say your enthusiasm for art is really contagious, and you would surely like one of my favorite chalk markers from which you can make amazing art pieces. Hope you like it!
Thanks, I’ll check it out 😊