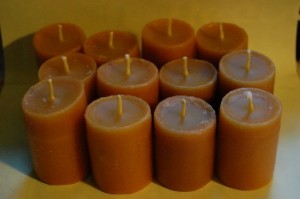
Homemade Votive Candles
 Homemade votive candles are fairly quick and easy as candles go. They’re fun to make and provide a nice little bit of light.
One of the things that sets votive candles apart from other candles is that votives are generally made with a metal wick tab. A wick tab is a little circle less than an inch wide with a raised hole in the center. A piece of wick is run through the center hold and the hole is pinched shut locking the wick in place. Then the tab is placed in the bottom of the votive mold with the wick facing upward.
Once your mold is prepared, melt your wax in a double boiler (or a smaller pan, set inside a larger pan of water if you don’t have a double boiler). I love using beeswax for homemade votive candles, but you can also use other types of wax as well. Different types of wax have different pouring temperatures, so check the package for your particular type of of wax. Beeswax is usually around 150 degrees.
If you use something other than beeswax, such as soy, be sure it’s sustainably sourced (Check out Candlewic.com for a selection of “EcoSoya” brand soy wax, which is sustainably produced in the US). Also be sure it isn’t “container blend” or you’ll have a hard time getting your candles out of the molds later. The best molds to use for votive candles are metal molds because the wax doesn’t adhere to metal as easily, making it easier to get the candles out in one piece.
Once your wax has reached pouring temperature, pour a little into the bottom of the votive mold, enough to cover the wick tab, and let it harden. Once it has hardened, pull the wick up tightly and wind it around a pencil on top of the mold or secure it with a wick clip. You can also made your own wick clips by taking a piece of cardboard, cutting a slit in it, and running the wick through the slit. Pull it up tightly so the wick is straight and set the card board across the top of the mold. The cardboard slit should hold the wick in place and the wick tab on the bottom will keep the wick from pulling out of the wax.
Reheat your wax to pouring temperature. I generally leave beeswax in its natural state when I make candles with it, but if you want scent or color, or if you’re using a different type of wax, add your color and scent when your wax has reached pouring temperature. Then pour the wax into the votive mold filling up the remaining space. Votives are small enough that you shouldn’t need to do a second pouring. However, they can sometimes crack around the wick during the drying process, so you may want to save a little bit of wax aside. If cracked do appear as your candle cools, reheat your leftover wax and pour in just enough to cover the cracks giving your candle a nice smooth appearance.
When the homemade votive candles have completely cooled, stick the molds in the freezer for a half hour. The wax will contract and pull away from the edges of the mold. Then you can flip the molds upside down and your homemade votive candles will pop right out. Then wait a few minutes until they warm up, light, and enjoy. Copyright © Amber Reifsteck ~ The Woodland Elf
The information provided on this website is for general information purposes only. If you choose to rely on the information on this website, you do so at your own risk and you assume responsibility for the results. (Full disclaimer here)
Enjoy this post? Click here to subscribe by email and get new posts delivered to your inbox.Ads by Google


