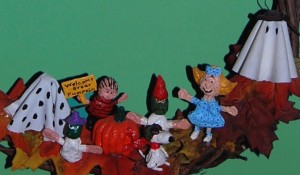
Charlie Brown Great Pumpkin Wreath
“There are 3 things I have learned never to discuss with people: religion, politics, and the Great Pumpkin.” Familiar words to anyone who likes Charlie Brown.

Earlier this week we broke out the Halloween movies starting with Hocus Pocus, the greatest Halloween movie ever filmed (which we have watched over a hundred times!), followed by the second greatest Halloween movie: Charlie Brown and the Great Pumpkin.
No one is ever too old to enjoy Charlie Brown; it’s good, clean Halloween fun at its finest. Its only drawback is that it lasts less than a half hour. I’ve always wished it was longer. So, a few years ago I came up with the design for this wreath, featuring the Peanuts gang. The figures are nothing more than paper mache crafted from a little flour, water, and tissue paper and they last a lot longer than a half hour. Now, even after the movie is over, Linus can continue searching for the Great Pumpkin.
You will need:
Grapevine wreath hoop
Tissue Paper
White fabric
Flour
Water
Sugar
Paintbrushes
Acrylic paint
Hot glue gun
Fake autumn leaves (dried ones will crumble in this particular case)
Orange Ribbon
Clear varnish/sealer
The Process
The paper mache paste is the first thing that will have to be made. Adding 8 parts water to 1 part flour, boil the two ingredients together in a saucepan. When it reaches the boiling stage, remove the pan from the heat and stir in a tablespoon or 2 of sugar. Let mixture set until it is cool, it will thicken into a paste as it does. When it has completely cooled, it can either be used immediately or stored in the refrigerator. It will usually last about a week before it starts to mold.
To make the ghost costumed kids, coat both sides of a circular piece of white fabric. Drape it over a small bottle, such as an aspirin bottle, and allow it dry. When the fabric is dry, use black paint to add the eyes, or in the case of poor Charlie Brown, multiple holes.
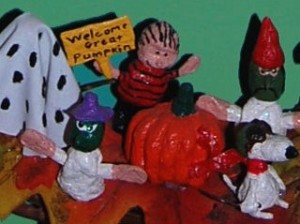
Charlie Brown Great Pumpkin Characters
To make the other figures, begin coating both sides of a piece of tissue paper. Tear the coated paper off in pieces, and crush them together into a ball. Then begin to form the figures. The paper mache coated tissue paper works much the same way as clay. Form the figures in separate pieces. Form heads, form arms, form legs, form bodies, and each character’s special pieces (i.e. witch hats, tail, welcome great pumpkin sign, etc.) Also form the pumpkin of paper mache. Leave the pieces to dry over night.
When the mache pieces are completely dry, glue the heads, arms, and legs to the bodies with a hot glue gun. When the glue has dried, use the acrylic paint to give life to the figures. After the paint has dried, brush the figures with a coat of clear varnish or sealer. This is usually sold on the same rack as acrylic paint.
Finishing Touches
Hot glue fake leaves to the bottom of the wreath, slightly rising on one side. When the glue on the leaves has dried, carefully attach the figures one by one with hot glue. Place Linus somewhere near his revered Great Pumpkin. Finish the wreath by placing a bright orange bow at the top, just off center. While it is a bit time intensive, this paper mache wreath can be reused year after year.
By Amber Reifsteck, The Woodland Elf
The information provided on this website is for general information purposes only. If you choose to rely on the information on this website, you do so at your own risk and you assume responsibility for the results. (Full disclaimer here)
Enjoy this post? Click here to subscribe by email and get new posts delivered to your inbox.Ads by Google


