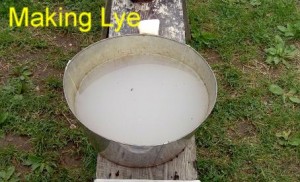
Homemade Lye
Lye is one of the ingredients used in old-fashioned soap making. I usually make the glycerin soap because it’s safer and pours into a mold more crisply, but once in a while someone puts in an order for good old-fashioned lye soap. The trouble is, sometimes it seems like finding waste from a nuclear reactor would be easier than drumming up some lye. However, this problem can be easily solved with a little homemade lye.
The main ingredient in homemade lye is ashes, so if you have a wood-burning stove, you’re already one step ahead of the game. My family has always heated with a wood stove, so I’ve never bought lye; I’ve always made it with the ashes from the stove. It’s not an exact science making lye this way, and once in a while I ruin a batch of soap with a batch of lye that wasn’t strong enough, but I love the challenge of doing it totally from scratch.
To make lye, construct a container that is open on both ends, but one of the open ends should be fairly small. I have a old plastic juice jug that I cut the bottom off of. So the bottom is the wide opening, and the top where the juice would normally pour out of is the small opening. You’ll cover that small opening with a thick piece of cloth. I usually achieve this by rubber banding a piece of cloth over the pour spout of the juice jug. Position your jug upside (fabric-covered side down) over another container to collect the water that will come out.
Now it’s time to make some homemade lye. Scoop some ashes into the open end of your jug, filling it about half way up. The cleaner the ashes are (without charcoal bits) the better the lye will be. Then add water, very slowly, until the ashes are completely covered. The water will pass through the ashes and start coming out the bottom of the jug (the pour spout part that’s covered with the cloth) in drops. The drops will be caught by the container below the jug.
It usually takes a full day or two for all the water to pass through the ashes. As it passes through the ashes, it collects the lye, so the water you get that flows through the fabric has the lye in it, but the ashes are prevented by the fabric from coming through. Lye is very caustic so be careful not to touch the liquid as it comes through.
Once all the water has drained through the ashes, take the lower container that you collected the strained water in, and dump it through the juice jug again, this time going through a fresh pile of ashes. Since you’re using the same water, this will make it stronger, as it leeches even more lye from a new batch of ashes. Then you’ll repeat a 3rd time straining your lye through yet another batch of fresh ashes.
By this point you may notice that your water has a few “crystals” in it. That’s normal and it’s a very good sign that the lye is ready. Don’t be too concerned if there are no crystals in your lye, however, as they don’t always appear, even though the lye is usable. 3 times through 3 batches of ashes is generally enough to make a good batch of lye.
Taking care not to touch the lye (which will be very caustic at this point), put the container of lye water in a safe space, clearly marked LYE so there are no accidents with it. Then you can use it in any soap recipe that calls for lye. And as an added benefit, the ashes you used to make your homemade lye can be added to your compost for a nourishing effect.
By Amber Reifsteck, The Woodland Elf
The information provided on this website is for general information purposes only. If you choose to rely on the information on this website, you do so at your own risk and you assume responsibility for the results. (Full disclaimer here)
Enjoy this post? Click here to subscribe by email and get new posts delivered to your inbox.Ads by Google


