Hoopskirt Making
A hoopskirt is essential for civil war reenactment costumes and some Renaissance costumes. It can also be used to give fullness to a wedding dress. While premade hoopskirts are available, it is much more cost efficient to make your own.

You will need:
2 flat strips of metal, no more than 2 inches wide. Should long enough to make hoops 120″ and 100″
Long pieces of scrap fabric
Strong yarn or string
Needle and thread
This is a 2-tiered set of hoops, and is fairly easy to make. To begin, you will need some long, flat strips of metal. For my skirt I found some discarded strips that had previously been used to bind stacks of lumber. I have also seen such strips in hardware stores such as Lowe’s.
Bend one strip into a circle, measuring it to be 120 inches around. Duct tape the two ends of the strip together. Wind duct tape around the entire strip to prevent it from rusting and staining the gown. (If your strips are made of no-rust metal, you can skip this step). Make a second hoop 100 inches around. Duct tape the ends together, and wind the entire strip with duct tape.
Cut 5 strips of fabric about 4 feet long and 2 inches wide. Tightly sew the the ends of these five strips to the 120″ hoop, evenly spacing them around the hoop.
Cut another strip about three feet long, and tie around your waist, making a sort of belt. Tie the free ends of the five strips to this belt, evenly spacing them. Adjust the height of the five strips until the hoop is several inches above the ground. Untie the belt from your waist, making sure the five strips stay tied to it.
Cut off any excess from the five strips. If you have a mannequin, put the hoops on it. If not, have a friend volunteer to wear the hoops for a moment. Take the 100″ hoop and hold it about a foot and a half above the bottom hoop. Run a piece of yarn through each of the fabric strips and tie them tightly to the 100″ hoop.
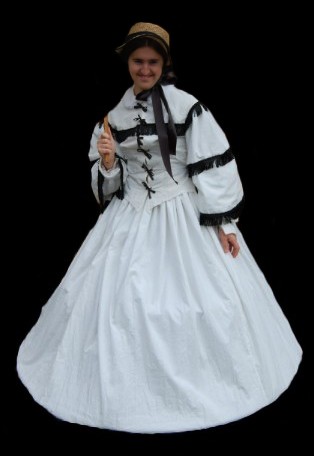
If your gown has a thick skirt, the hoop forms won’t show through the dress. If they do, add a petticoat beneath the hoops. This is what the finished product looks like (I sewed my skirt to my hoops for convenience, so I don’t have a picture of just the hoops).
By Amber Reifsteck, The Woodland Elf
The information provided on this website is for general information purposes only. If you choose to rely on the information on this website, you do so at your own risk and you assume responsibility for the results. (Full disclaimer here)
Enjoy this post? Click here to subscribe by email and get new posts delivered to your inbox.Ads by Google


