Churning Butter
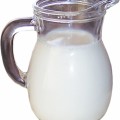
Some days are butter days. (Yes, at my house I still actually churn my own butter). My mom’s cousin has a dairy farm where he sells raw milk, so every few weeks my aunt makes a milk run to his farm. Then she distributes to everyone in the family. Each gallon mason jar has a nice 1-2 inch layer of cream on top, just perfect for churning butter.

Churning Butter Basics
There are several different ways to churn butter. There is the old churn and dasher method, but few people have enough cream to fill one of these. Then there’s the butter bowl method which involves stirring the cream in a large wooden bowl until it becomes butter. And then there are the shaker jar and the paddle jar methods. These two are probably the most convenient.
If you only have a relatively little bit of cream, the shaker jar method works well. Simply fill a canning jar with the cream, screw on the top and shake the jar until the cream turns to butter. The drawback of this method is that your arms generally feel like they’re going to fall off from exhaustion long before the butter begins to form.
Paddle Jar Churns
The paddle jar is a much easier method. The paddle jar is basically a glass jar with a set of paddles that churn the butter as you turn the handle. The one we use belonged to my great-grandmother, so it’s over a hundred years old, but it still works great. However, since the majority of people probably don’t have their great-grandmother’s churn hanging around the house, you can also purchase them from Lehman‘s or Amazon.
To churn butter, leave jars of milk in the refrigerator over night. This will allow the milk to settle, so all the cream is easily accessed at the top of the jar. Use a measuring cup to dip the layer of cream off the top of the milk and put it in the churn.
Begin to churn the cream, moving the paddles at a relaxed rate. You’ll be there a while so don’t wear yourself out by trying to go too fast. (If using the shaker jar method, just shake as hard you can for as long you can, then pass the jar to a friend and have them do the same).
Butter Stages
The cream will go through several stages. First it will slosh up and down on the sides of the jar like milk. Second the top of the cream will start to bubble and suds-up. Then the bubbles will subside and the cream will become smooth again, but as it sloshes against the side, it won’t slide away cleanly; it will begin sticking to the jar. When this happens the cream is beginning to “butterize.”
Keep churning, stopping periodically to check the cream inside. When you see thick clumps form, you can celebrate. Spoon out of the clumps of butter into a bowl, and save the leftover liquid for any recipe calling for buttermilk. The butter is best best kept in the refrigerator until you are ready to use it as it will go bad faster than store-bought butter, due to not having the preservatives.
The Weather Can Determine The Butter
Once in a while, for some reason still unknown to mankind, the cream will refuse to turn to clumps of butter. It will instead form a light and fluffy layer of whipped butter. Don’t despair. Although it may not be traditional butter, that fluffy stuff is the sweetest tasting butter you will ever have.
One tip I got from my grandmother when I first started churning butter was that weather plays a role. Butter can’t be churned when a thunderstorm is coming. After a while of churning, I learned this folk wisdom was true. I assume it must have something to do with the humidity. But whatever the reason, I find butter much easier to churn when there’s no storm on the horizon.
Written by Amber Reifsteck, The Woodland Elf
The information provided on this website is for general information purposes only. If you choose to rely on the information on this website, you do so at your own risk and you assume responsibility for the results. (Full disclaimer here)
Enjoy this post? Click here to subscribe by email and get new posts delivered to your inbox.Ads by Google