How to Make Candles: The Basics
 Candle making is a fun hobby that allows a crafter almost unlimited creativity. Here are the beginning basics for how to make candles.
The Tools
Firstly, you’ll be needing a double boiler. The double boiler helps keep the wax from overheating and catching on fire as direct heat might do. If you don’t have a double boiler you make a substitute by putting one pan inside a larger pan of boiling water. Use a pan that you don’t plan to use for anything else, as the wax pretty much never comes off a pan once you’ve used it for candle making.
You also be needing a candy thermometer, candle scent (for a healthier option, choose scents that are naptha-free, or opt for essential oils. Essential oils are the healthiest most eco-friendly option, but they also don’t last as long as in the candles. So if you plan to store your candles for a while before burning them, you might want to use synthetic scent.) and candle color, and wicking. Choose wicks that are lead-free as they’re much healthier. The size and type of the wick will depend on what type of candles you’re making (i.e. the thicker the candle, the thicker the wick.) Natural waxes also require thicker wicks than paraffin due to their hotter burning temperatures.
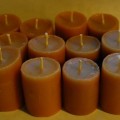
And of course you’ll be needing candle making wax. There are many types of candle making wax, but I generally advise staying away from paraffin. Though it’s the most common wax, it’s not very eco-friendly being derived from oil; it also gives off a lot of smoke. Instead choose a natural wax like soy, palm, or beeswax. These waxes are not only more eco-friendly, they’re much cleaning burning, without all the smoke of traditional paraffin wax candles.
While a bit more expensive than paraffin wax, natural waxes are much harder waxes than paraffin making them much more efficient and therefore longer lasting candles. Beeswax also tends to have its own pleasant scent and golden color, which can eliminate the need for candle color and scent. If you choose soy or palm wax, do a little research into the supplier to ensure that the wax is coming from sustainably sourced palm and soy, not clear-cut fields.
The Process
Place your wax in your double boiler and turn the heat on low. You want to keep a pan top handy nearby to smother any flames if the wax should catch on fire. While the wax is heating, make sure you stay with it (never leave it unattended). If you notice it smoking at all, pull it off the heat source immediately. Wait until the smoking has stopped before returning it to low heat.
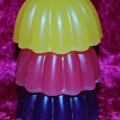
When the wax has completely melted, stir in your candle color. Add it slowly, testing it until to reaches the desired color. Wax color is darker when it’s solid than when it’s liquid, so you’ll want to test it by taking a spoonful of the hot wax and dropping it into a glass of cold water. It will harden immediately and show you the true wax color. Continue testing until you reach your desired color.
Once color is added, continue heating until it reaches pouring temperature (use your candy thermometer to check the wax temperature). Pouring temperature differs depending on the type of wax you’re using, so check your wax package for suggested pouring temperature. Generally soy wax is between 120-140 degrees, beeswax around 150 degrees, palm wax around 200 degrees.
At this point add your candle scent. Like color, scent is dependent on preference, and it may take a little trial and error until you figure out exactly how you like it, but a general guide is to add 1 oz of scent per pound of wax. This goes for both synthetic scents and essentials oils. It’s best to do the scent step last, especially if using essential oils as the scent, since the heat tends to burn away the scent. So the less time the scent is on the heat source, the more scented it will be. Then once your scent is stirred in, pour your candles.
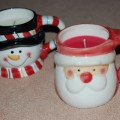
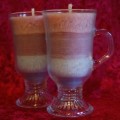
So those are the basics for how to make candles. Beyond this point it just depends on what type of candle your making as to what you do next. There are many options from dipping, to to molding, to making container candles. The only limits are those of your imagination. Copyright © Amber Reifsteck ~ The Woodland Elf
The information provided on this website is for general information purposes only. If you choose to rely on the information on this website, you do so at your own risk and you assume responsibility for the results. (Full disclaimer here)
Enjoy this post? Click here to subscribe by email and get new posts delivered to your inbox.Ads by Google