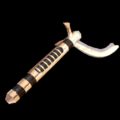
Adam Project Lightsaber DIY With Detachable Blades
In this tutorial we’ll be making a DIY Adam Project lightsaber…or as big Adam kept telling little Adam: it’s not a lightsaber.

MATERIALS USED:
Cardboard tube
Holographic vinyl
Cardstock
Large white paper
Purple tissue paper
5mm black craft foam
2mm black craft foam
Something thin and round (I used old marker tops)
Strong magnets
Utility knife
Iron
Scrap paper
Scissors
Multi-surface glue (Power tac)
White school glue
Black paint
Paint brush
*Optional: Battery powered lights if you want to light your blades
Lightsaber or not, the Adam Project lightsaber was still pretty cool, so I knew I needed to add it to my collection. It’s a very simple design so it’s quick and easy to make.
This build is mostly cardboard, with a little bit of junk mixed in (who knew marker tops from spent markers could be so handy?). This lightsaber build also gave me the opportunity to try out some Cricut holographic vinyl.
I don’t actually have a Cricut machine, but I find their products actually come greatly in handy for cosplay projects, even without a machine. In this case, the holographic vinyl gives the illusion of glowing ends.
I found the stuff so cool, I’ll also be using it as part of a holographic Easter project next week. In the meantime, let’s make ourselves a non-Star Wars lightsaber!
Due to this prop’s very simple design, I was also able to add blades to it. You’ll see in the video that there’s the option to light the blades. Or just make it easy and give the illusion of light with tissue paper. All depends on your personal preference.
Video tutorial by Amber Reifsteck, The Woodland Elf
*Some of the above links may be affiliate links*
The information provided on this website is for general information purposes only. If you choose to rely on the information on this website, you do so at your own risk and you assume responsibility for the results. (Full disclaimer here)
Enjoy this post? Click here to subscribe by email and get new posts delivered to your inbox.Ads by Google


