DIY Planner That’s Reusable
In this tutorial I’ll show you how to use an old 3-ring binder to make a DIY planner that’s reusable.

MATERIALS USED:
Planner Printables: (available free in my patterns vault)
3 ring binder
Page protectors
Dry erase marker
Chalkboard marker
I have never liked store bought planners; I have several problems with them. For one thing store bought planners are always so small that there’s just not enough room to write anything in them.
They don’t generally make a planner that fits me as a flower farmer/photographer/costume maker/author/crafter. Store bought planners are really not customizable for that, no matter how much they say they are.
Plus they’re not really easy to change things in them. You have to erase everything and it’s a pain in the neck.
I looked several years for a reusable planner, as I always felt single-use planners were rather wasteful. You have to get a new one each year. I could never find a reusable one, so I decided to make my own.
Enter The 3-Ring Binder
My sister had amassed an impressive collection of 3-ring binders that she wasn’t using. So when she decided to clear those out, I took one.
I chose one that had a plastic cover, and inside were page protectors. The great thing about these is you can just write on them, and erase it with a dry erase marker, which means I can change anything in the schedule I want.
My schedule changes often, so that’s what I need. Plus I can reuse the same planner over and over again, every year, which makes it super ecofriendly and zero-waste.
This planner is also fully customizable. The printables I’ve created for it have blank headings so you can make them fit your own life. You might not film videos like I do, so you might use that page to keep track of your meals for the week, or your fitness routine, etc.
Simple Is Better
This DIY planner is very simple and very basic intentionally. I’ve tried too many planners that have a lot of different pages and types of info to fill in. Looking at that much information overwhelms me, making me feel like I’ll never get it all done.
So I purposely made this planner very simple to avoid that. However, if you prefer an elaborate layout, feel free to make yours as fancy as you want. That’s the great thing about making your own DIY planner; it’s totally customizable so you can make it work for your own needs.
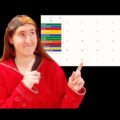
I don’t have calendar pages in this planner purposely. I’m synesthetic, which means I see time visually. As such, standard planners with their pages of days don’t work well with my visual way of seeing time.
The “calendar view” of a standard calendar works better my personal time experience. I’m less likely to get overwhelmed or forget things with a traditional calendar view. But as a standard calendar is just too small to write my daily schedules on, I use my Google calendar (which I talked about a few weeks ago here) in conjunction with this planner.
If you prefer to have calendar pages, it’s easy to add them.
Video tutorial by Amber Reifsteck, The Woodland Elf
*Some of the above links may be affiliate links*
The information provided on this website is for general information purposes only. If you choose to rely on the information on this website, you do so at your own risk and you assume responsibility for the results. (Full disclaimer here)
Enjoy this post? Click here to subscribe by email and get new posts delivered to your inbox.Ads by Google