Do It Yourself Insulation
When you hear the word insulation, rolls of that pink fiberglass stuff is usually what springs to mind in most people’s heads. It’s usually not something you hear in the same sentence as the phrase: Do It Yourself. However there are in fact ways to DIY it that are a lot healthier and more eco-friendly than the pink stuff.
Lately I’ve been getting a craft studio into shape (since filming my tutorials on my bedroom floor, and having my sewing machine on a card table beside my closet just aren’t the most practical solutions in the world…). It’s been very slow going, due my still have low energy bouts from that little broken face experience a few years (don’t ya just hate it when almost dying interferes with your schedule?) And last fall I finally got it insulated. (Which means now I get to do the fun part and decorate it, YAH!)
Since I live in Upstate NY, it can get pretty cold here in the winter, but since winter is my off-market season, I actually have more time to work on tutorials and costume orders then. So I wanted my craft studio to be an all-weather building, which of course means insulation to help hold the heat from the heat source.
In effort to keep everything eco-friendly, I knew I didn’t want to do that pink fiberglass insulation. So I began researching other methods I could use. Eventually I settled on sheep’s wool, because it’s a terrific insulator and way better to breathe than the pink stuff (as in, you don’t even need a mask to use it).
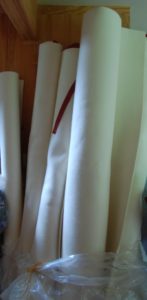
I contacted the Sutherland Felt Company. They sell large rolls of compressed felt in several different colors. I told them that I wanted to insulate my craft studio and they were very helpful in assisting me with choosing the right felt thickness for my needs. I opted to go with the cream color, since I only have exterior walls, so the insulation would be showing (another reason I didn’t want that nasty fiberglass stuff). So I ordered 37 yards of the 1/4 inch thick compressed wool felt. And let me tell you, that stuff has a great R-value, and it REALLY insulates.
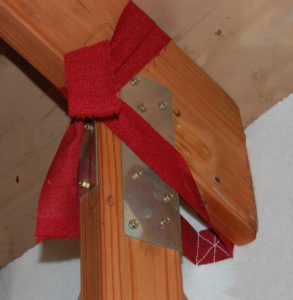
Tie strips attaching the insulation to the rafters.
The insulation was only 6 feet wide, and my walls are almost 7 feet high, so I knew I’d be doing a little sewing to compensate. I would cut 7 foot pieces off the roll of the insulation, and sew them together along the sides. I did it in sections to ensure they didn’t get too heavy to carry, so basically each sewed section consisted of 4 pieces of 7×6 insulation sewed together. Once sewed together, each section of 4 panels was 7 feet high, and just under 24 feet long.
I also sewed a series of “tie strips” made of heavy canvass on every few feet along the top edge of the sections. Those would be used to attach the insulation to the rafters later. All in all it was a nice color combo; I knew the cream wool and the dusty red tie strips would match nicely with the warm wood skeleton of the craft studio.
It took me about 6 months to get all the sections sewn. It was a project I had to do by hand, using very heavy thread, because the insulation was much too thick to fit under my sewing machine. So I pretty much spent every weekend hand-sewing insulation while watching westerns (hey, there are worse ways to spend a weekend), and 6 months later I was done.
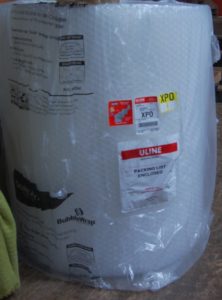
Just in case you’ve ever wondered what 325 feet of bubble wrap looks like…
In order to keep the insulation from directly touching the outer wall and give it some breathing room, I did have to go the plastic route, but still less hazardous than pink insulation. I ordered a roll of bubble wrap (and yes it’s nearly impossible to resist popping the bubbles on a roll of bubble wrap that big, but I think we did a fairly good job of refraining…just a few pops here there 😉 ).
Once the bubble wrap arrived, I had my dad and my cousin help me insulate it. The bubble wrap got stapled in place to separate the insulation from the outer wall. And then one by one, we tied all the red strips to the roof rafters to hold the insulation in place. It ended up being a 9-hour job, but the result was well worth it.
It’s safer, and more eco-friendly as it’s a completely renewable resource (sheep have to be sheared every spring anyway). And the cream color is so beautiful, there’s no need to cover it up with interior walls. It’s a very relaxing atmosphere whenever I’m in there, and it’s nice to know I don’t have to worry about breathing anything bad from it.
by Amber Reifsteck, The Woodland Elf
The information provided on this website is for general information purposes only. If you choose to rely on the information on this website, you do so at your own risk and you assume responsibility for the results. (Full disclaimer here)
Enjoy this post? Click here to subscribe by email and get new posts delivered to your inbox.Ads by Google