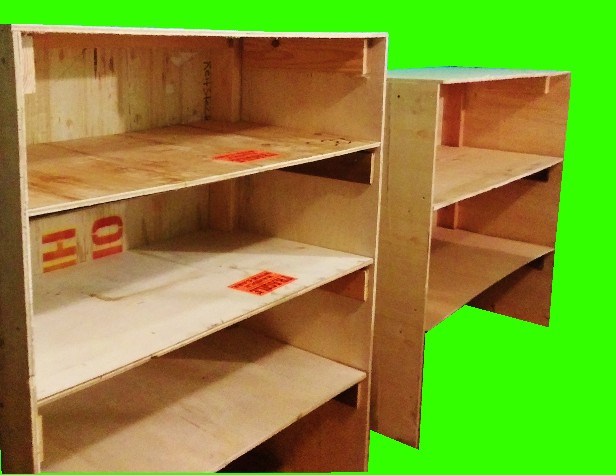
How To Build Shelves from Salvaged Wood
In this tutorial, I’ll show you have to build shelves from an old shipping crate.

MATERIALS USED:
Salvaged wood (plywood and 2×4’s or smaller slats)
Hammer
Nails
Screws in various sizes
Driver/drill
Circular saw
Tape measure
Pencil
Wood glue (optional)
I recently had some windows shipped to my house, and they arrived in a big crate made of sanded plywood (yes, seriously, SANDED plywood). There was no way I was letting that nice wood go to waste, so I set about dismantling the shipping crate.
I ended up with several pieces of plywood in varying sizes, a few 2×4’s, and a bunch of cedar slats. (I could tell they were cedar by the smell 
I’d been needing some shelves in the storeroom for a while, so the wood was just perfect for the task. I ended up getting two large shelving units out of the wood I salvaged from the crate. I even saved the screws from the crate and used them to assemble the shelves, making the shelving units totally free, except for a couple of nails.
The nice thing about making your own shelves is that you can custom size them to your needs. And since it’s salvaged wood, they’re free and eco-friendly.
My shelves are just in a back store room, but you can also paint your finished shelves if they’re going to be in a more prominently seen place.
Video tutorial by Amber Reifsteck, The Woodland Elf
The information provided on this website is for general information purposes only. If you choose to rely on the information on this website, you do so at your own risk and you assume responsibility for the results. (Full disclaimer here)
Enjoy this post? Click here to subscribe by email and get new posts delivered to your inbox.Ads by Google


