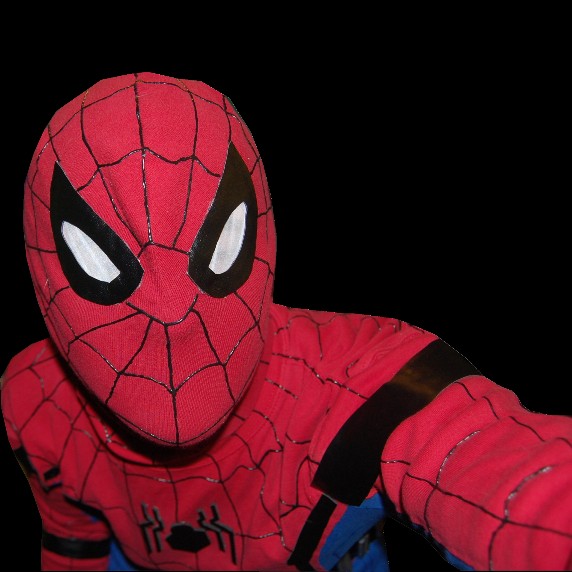
Spiderman Costume Part 2: How to Make a Spiderman Costume Mask
Spiderman, Spiderman, does whatever a spider can…at least when he has his mask on. So here is how to make a Spiderman costume part 2, the all-important, identity-hiding mask.

MATERIALS NEEDED:
2 feet of red material (or an old red shirt)
A little fake black leather (if you made the Spiderman top from last week’s tutorial, you should have plenty left from that)
Sewing machine or needle and thread.
Blue fabric marker
Hot glue gun
Scissors
3 inches of white chiffon
Black puffy paint (optional)
I don’t have a template for the main part of the mask, since it’s super easy to just freehand. However, you’ll want to make sure that it’s long enough to cover your neck. Also if you have long hair like me, you’ll have to add an extra couple inches to account for it (I didn’t, so my mask ended up a little short in the back). The white chiffon for the eyeholes can be found cheaply at JoAnn fabrics.
Like the first part of the Spiderman costume, I chose to go over the drawn-on lines with some black puffy paint just to give it a bit more texture, but that step is optional. Be sure your red material is super stretchy so the neck hole will fit over your head (I used an old red knit shirt for it). You can just hot glue the seams together if you’re not comfortable sewing, but I think a stitch holds it a little more securely.
If you want a template for the eye sockets, click here to download a free one.
Video tutorial by Amber Reifsteck, The Woodland Elf
The information provided on this website is for general information purposes only. If you choose to rely on the information on this website, you do so at your own risk and you assume responsibility for the results. (Full disclaimer here)
Enjoy this post? Click here to subscribe by email and get new posts delivered to your inbox.Ads by Google


