
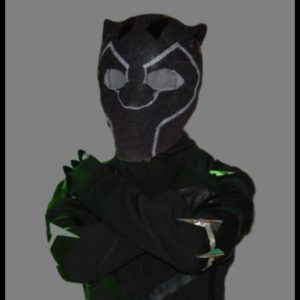
Black Panther Part 3: DIY Black Panther Mask
Need a kick-ass DIY Black Panther mask? Got you covered.
MATERIALS USED:
Black panther mask template (download it from my free patterns vault)
1 foot of Fosshape black (It’s sold by the yard, so you’ll have some leftover for other projects, or in case you make a mistake)
Needle and thread or sewing machine
Glue that won’t melt when heated up (I used Power-tac)
6 inches of pleather (found in JoAnn Fabrics)
Metallic silver paint (Silver Anniversary)
Paintbrush
Scrap pieces of white chiffon (found in most fabric stores, JoAnn’s, etc.)
Awl
Black yarn
Heat gun or other heat source
Head form in your head’s size
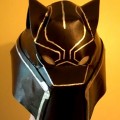
In this video I’ll show you how to make the Black Panther mask out of Fosshape, a really neat heat-reactive felt (made by the same people who make Wonderflex) that will hold any shape you put it in. (And if you saw my first attempt at a DIY Black Panther mask a couple years ago, then you know it was definitely time for a better upgraded version.) This one is based on the mask he wore in the Black Panther movie, though I’ve simplified it a bit.
This mask doesn’t actually fit me, because I made it to fit one of my friend’s kids (who was too shy to be in the video), and I haven’t made a bigger one for myself yet. But I enlarged the pattern to make it fit bigger heads (though depending on your head size, you may still have to shrink or enlarge the template a bit).
You will have to make sure that whatever form you’re using under the Fosshape is big enough to match your head size, as the heat will form the Fosshape tightly around it. If your form is too small, then the finished Fosshape mask won’t fit your head. Since I was making it for a child’s head, I was able to get away with one of those little foam mannequin heads, but if you’re making it for an adult or older child, then you’ll definitely need something bigger. (Think soccer ball size)
I used the Fosshape Black (400) for this DIY Black Panther mask, because it meant I didn’t have to paint anything afterward (Yah! Time saver!) But if you want something a little thinner, you could use the Fosshape 300, which is white, and then just paint it black. (Though personally I liked the thickness of the 400, because when it shrinks, it melds into the seamlines making them almost invisible).
I used my woodstove (yeah, it’s spring in Upstate NY, which means I still need my wood stove on…) to heat up the Fosshape, but you can also heat it up with a heatgun to make it easier.
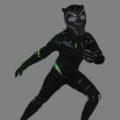
This is the third part of the DIY Black Panther costume tutorial. If you missed the first part, the claw necklace and gloves, click here to check that out and the second part of the tutorial, the bodysuit, can be watched here.
Video tutorial by Amber Reifsteck, The Woodland Elf
*Some of the above links may be affiliate links*
The information provided on this website is for general information purposes only. If you choose to rely on the information on this website, you do so at your own risk and you assume responsibility for the results. (Full disclaimer here)
Enjoy this post? Click here to subscribe by email and get new posts delivered to your inbox.Ads by Google


Can I use foam?
You can foam, but if you use my template with it, you’ll have to edit it a bit. I designed the template to be used for fosshape which shrinks. So if you use foam, you might need to resize some of the pieces, especially around the eyes, so they’ll fit together properly.