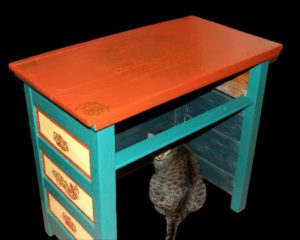
DIY Upcycled Tricolor Mandala Desk
What can you do with a stencil and a few cans of paint? Transform a beat up old desk into a cool folksy bohemian piece of furniture. Check out the video tutorial below to see how it’s done.
MATERIALS USED:
An old desk
Sandpaper or electric sander
Mask (to protect your lungs from sanding dust)
Cloth for cleaning desk and wiping away sanding dust
Red, green, and yellow paint (use whatever colors appeal to you and your decor).
Paint brush
Painter’s tape
Stencils (here’s the link to one I used)
Metallic artist pen (I used the gold one)
The desk I started with was an old one that’s probably been in my family since before I was born. It’s a desk that has seen a lot of miles. It used to be my cousin’s when he was little, and then when he got rid of it, my siblings and I put it in our treehouse, where it sat until the treehouse rotted away. And now the desk is in my craft room. Needless to say it’s a little beat up after all these years of being shuffled around.
The drawer is long since disappeared and the layers of paint have been worn and peeling for quite a while (and not in the cool “quaint vintage look” way, but in the every-time-you-touch-it-another-foot-of-paint-flakes-off way). So since I was getting tired of sweeping up around it, I decided it was time to refurbish it!
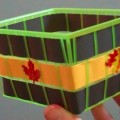
Since it sits right next to that big bohemian cupboard I picked up at the second hand shop in Victor earlier this year, I thought I’d paint it to match the cupboard, but with a few changes. So I used the same color scheme, but added some stenciled designs in the inserts and used a gold artist pen to draw a big freehand mandala on the top of it (yes, I’m very proud of that freehanding, despite the 3 hours and hand cramp that it cost me to do).
The nice thing about this desk is that it’s easy enough that it doesn’t take much artistic talent, just a few stencils and a little paint. For the mandala on top, if you’re not sure about your own drawing skills and want to simplify the process, just do a quick internet search for mandala stencils and you should be able to find something to your liking.
The stencils I used on the side were something I picked up in the local JoAnn’s. I usually make my own stencils, since purchased stencils are so overpackaged and create a lot of waste (I mean seriously, why do they have to come in a plastic bag? The stencils themselves are already plastic, so it’s not like they’re going to spoil or something). But I happened to come across that stencil, and it was pretty much exactly the type of design I was looking for, so I gave in and bought the overpackaged stencil.
However if you want to make your own stencils it’s easy to do. Just print off a silhouette you like onto a piece of cardstock and cut out the black parts with an x-acto knife or pair of scissors. Then you’ll have a simple stencil you can use for a fair while before it wears out. (And bonus eco-points if the cardstock is at least 50% post-consumer waste).
And if you don’t have a piece of furniture handy to upcycle, hit your local Salvation Army or other second hand shop. You should be able find something to upcycle fairly inexpensively.
Video tutorial by Amber Reifsteck, The Woodland Elf
*Some of the above links may be affiliate links*
The information provided on this website is for general information purposes only. If you choose to rely on the information on this website, you do so at your own risk and you assume responsibility for the results. (Full disclaimer here)
Enjoy this post? Click here to subscribe by email and get new posts delivered to your inbox.Ads by Google