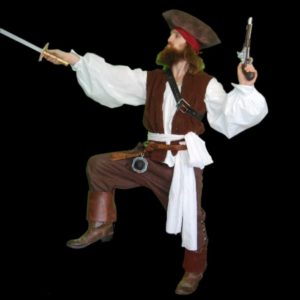
Jack Sparrow Costume Part 4: Bandana and Hat
This is the final part of the requested Jack Sparrow costume tutorial. In this part I’ll show you how to make Captain Jack’s hat and bandana.
MATERIALS USED:
1 yard of Fosshape 300 (You’ll only use around half a yard or less, but it’s sold by the yard) – Fosshape can be purchased here.
Something dome-shaped to form the hat around – I used a gourd about the size of my brother’s head.
Heat gun, iron, or some sort of heat source to heat the Fosshape
Scissors
1 foot of 1/8 inch ribbon and needle (any color; it’ll get painted over)
Brown fabric paint
Darker brown spray paint (I used a glossy dark brown Krylon)
Brown acrylic paints (I used Metallic antique copper and JoAnn Fabrics Dark Brown acrylic)
2×2 square of red fabric (may need it to be smaller or larger depending on your head size)
Black fabric marker
The material I used here is called Fosshape. It’s sold by the yard for around $14 a yard (plus whatever shipping is to your area), but you’ll end up only using around a 3rd or half a yard for this hat, so it’s fairly affordable.
The nice thing about this stuff is that it’s a soft felt-like fabric with a reasonable amount of stretch to it, so you can pretty much make it any shape you want. Then once you heat it up, it becomes solid and holds that shape. Most of the time you’ll probably want to cut a few pieces and sew them together before you heat them up, but this was my first time using Fosshape, and I wanted to see just how far I could push it.
Turns out I could push it pretty far. I ended up making the entire hat out of one piece of Fosshape, just by stretching and heating it one way, and then the other. So this stuff is really fun and easy to create costume pieces with.
I used a combo of a hair dryer and my wood stove to up my Fosshape because my heat gun decided to stop working, but I don’t really recommend it. It takes forever to get it hot enough with the hair dryer, so use a heat gun or a steam iron for faster, more even heat.
Take it slowly working one section at a time. The more you heat it, the harder it becomes. And it is somewhat forgiving, so if you make a mistake, you can reheat it and reshape it fairly well. The hat does look a little fuzzy even after it’s painted, so you might want to put some type of acrylic sealer over it before you paint it to make it look smoother and less fuzzy.
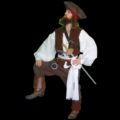
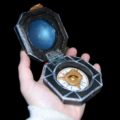
If you missed the rest of the Captain Jack tutorials, click here for the compass; click here for the pants, shirt, and sash; and click here for the boots, vest, and sword tutorial.
Video tutorial by Amber Reifsteck, The Woodland Elf
*Some of the above links may be affiliate links*
The information provided on this website is for general information purposes only. If you choose to rely on the information on this website, you do so at your own risk and you assume responsibility for the results. (Full disclaimer here)
Enjoy this post? Click here to subscribe by email and get new posts delivered to your inbox.Ads by Google